Tìnhyêu36kế
C O N T R A
- 22/11/05
- 1,653
- 48
Mọi người ai biết thì dịch hộ em bài này với, em xem mà chả hiểu gì cả! hu hu! chán quá hà!
Scrolling Text
So, what is the very first thing I want the player to see? Probably not just jumping to control of the hero. I decide on some scrolling text giving the player a short introduction to the world. I open up my graphics program, and make this image:

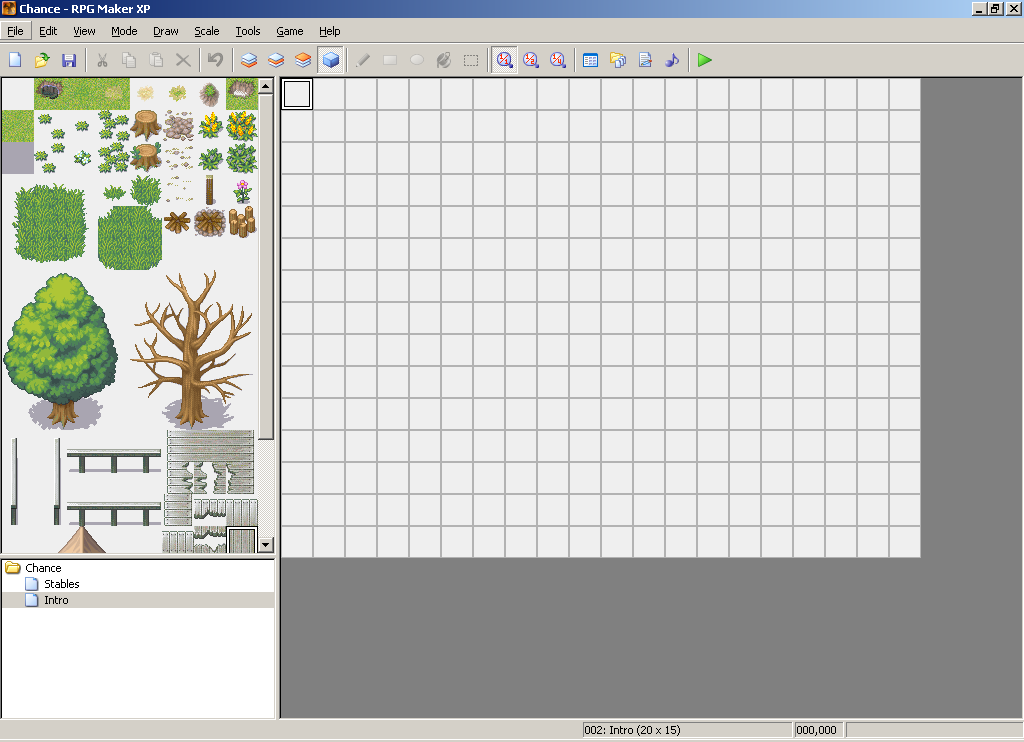
Great! Now, I just need to show it to the player. I make a new map, and add nothing to it. That white square will show up as black to the player. Click to enlarge:
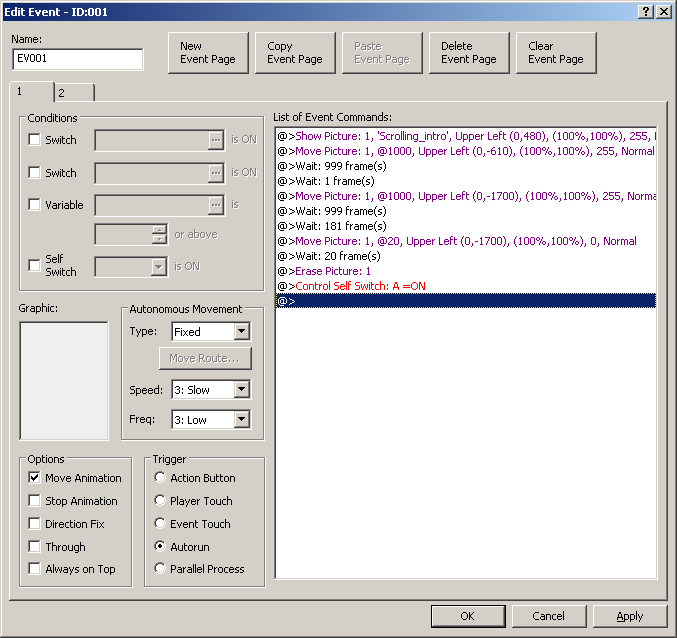
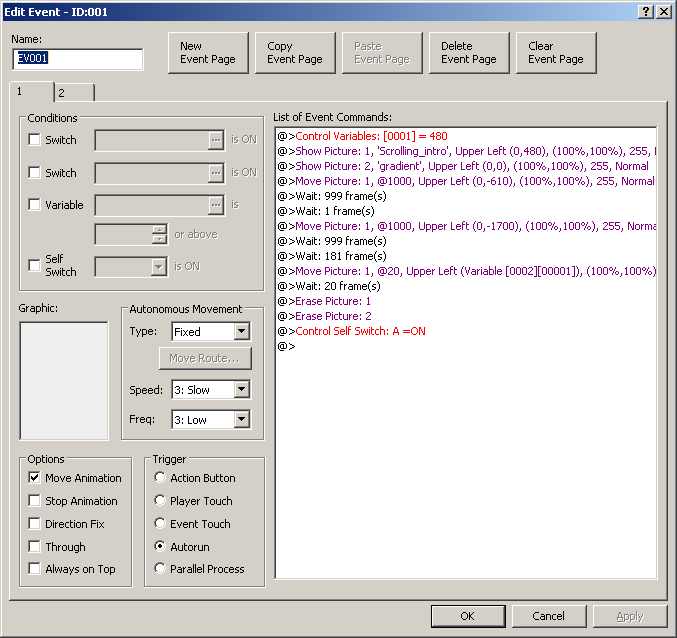
The standard position for autorun and parallel process events is the upper right corner of a map. Wherever you choose to put them, make it consistant. I make an autorun event up in the corner. In it, I show the picture "below" the viewing area, then scroll it up. The first time I try it, the text scrolls too fast, so I break the movement up into two move pictures, since the maximum number of frames it can take for one movement is 1000. Click the images to enlarge.

A little something about screen coordinates. The very top left pixel on screen is (0, 0), and the very bottom right pixel is (640, 480). Thus, when I initially assign the image's x and y coordiantes, I put it at (0, 480), just off the screen and all the way to the left. When I move it the first time, I move it up to (0, -610), still all the way to the left, and now the top left corner of the image is 610 pixels "above" the top of the screen. The second time I move it to (0, -1700), which means that only the very bottom of the image will be visible. See how that works? Well, if you don't, check out the project file I will be linking shortly.
Playtesting that, it looks pretty good. But you know what would make it better? Having the text fade in and out as it scrolled onto the screen. Using my graphics program, I make a gradient from black that becomes transparent on a 640x480 image. I then copy that gradient and paste it on the top of the image, resulting in this:

Now I just show that image over the scrolling text image.
Now that looks pretty.
http://img.photobucket.com/albums/v226/ccoa0/Chance/intro_screen01.png
All that's left is to pick out some music. I go through my resource collection, and browse around online, until I find some music I think fits, in this case a nice piece by illustrationism. I then import it using the Materialbase, and set it as the background music for the blank map. Right click on the map, and select Map Properties...
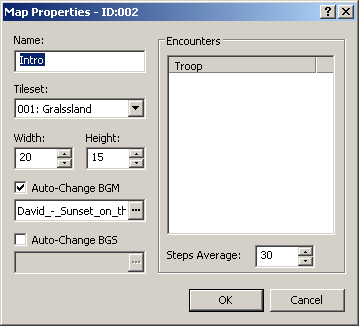
Now when the text scrolls, the music plays. But what's this? The music is almost perfectly the right length, but it starts over in the last few seconds of the intro. I don't really want that, so I go back to the Materialbase, and delete the song I just imported, and then import it as a Music Effect (ME). I go back to the map properties and remove it as the music for that map, and then put in a Play ME event command in the autorun event:
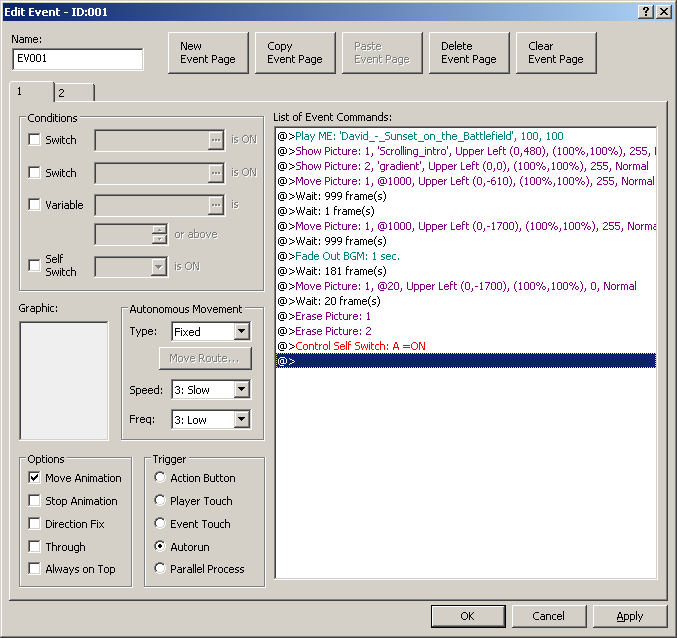
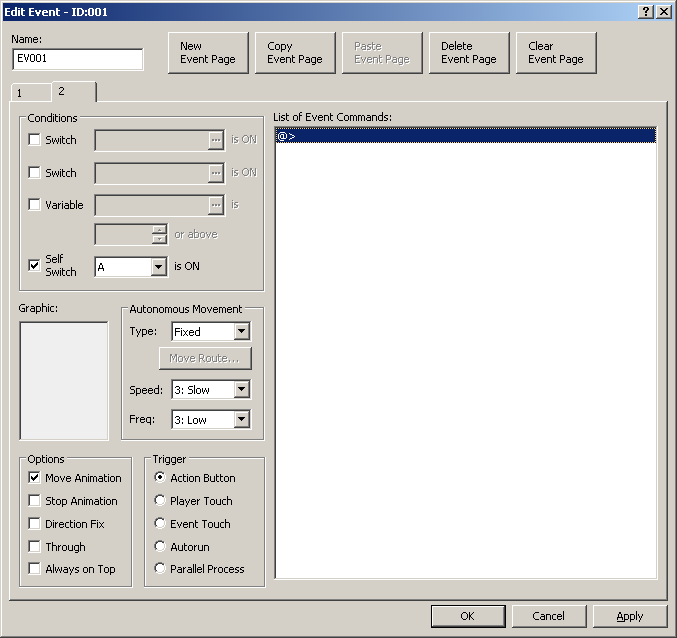
Now, let's go through this finished event in more detail.
ME Event command
This is the Play ME event command, located on the second page of event commands. Music Effects, or ME's, play only once, unlike background music. They're generally used for things like inn music, victory music at the end of a battle, or celebratory music when you find a key item. In this case, we're using it in a slightly nontraditional way, but making RPG's is all about thinking outside the box.
The 100 and 100 following the ME command are the volume and pitch of the ME, respectively. Volume is obviously how loud the ME should be, with 100 being the loudest and 0 being inaudible. Pitch is how fast the ME should play, 100 being at 100% speed (or rather, normal). You can play it at up to 150% speed, or as low as 50%.
Show Picture event command
This is the command to show images you've imported as pictures. The dialog for doing so is a little complex, so let's take a closer look.
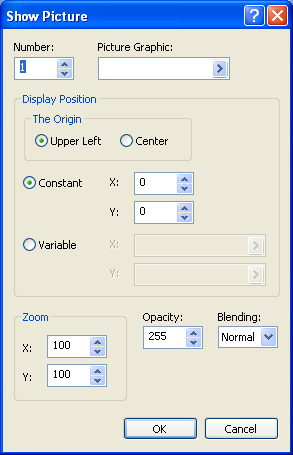
The first thing you see is the number. This is a handle on the image, so that you can later move and erase it. Generally, I number pictures in the order that I show them, so I can remember which is which.
The second is the picture name. You can select any of the pictures you've imported from here.
Next we come to the display position. The first option is the origin. This is what point on the image the program will use when placing the image. If you select Upper Left, and place the image at screen coordinate 0,0, then the upper left corner of the image will be at the upper left corner of the screen. If you pick Center, and place the image at screen coordinate 0,0, then the center of the image will be at the upper left corner of the screen, and only the lower right quarter of the image will be visible.
Also in the Display Position is the X and Y coordinate. Here, you have a choice: you can either specify a X and Y coordinate yourself, or you can load an X and Y coordinate from two variables. Loading from variables becomes important when making event systems and the like.
In the lower left corner, there are options for Zoom. It's fairly self-explanitory, you can choose to zoom in or out, and on the x or y axis seperately. Play with it if you're not feeling very sure.
Opacity is how transparent an image is. 255 is completely opaque, or not transparent at all, 0 is completely transparent, or invisible.
Blending effects the colors of the picture, how it "blends" with the layers behind it. Normal will show the picture normally. If you're familiar with any graphics program like Photoshop, you're probably familiar with Addition and Subtraction blending modes.
The Addition blending mode works as follows: Given a foreground and background pixel, represented by the RGB vectors F=[r1,g1,b1] and B=[r2,g2,b2], the pixel obtained from the Addition blending mode is R=F+B=[r1+r2,g1+g2,b1+b2]. Or, in other words, if a pixel in the background is color 100, 100, 100 in RGB values, and a pixel that will overlap it in the picture is 25, 50, 135, then the resulting color in the image is 125, 150, 235.
The Subtract blending mode works as follows: Given a foreground and background pixel, we'll again represent each as an RGB vector F=[r1,g1,b1] and B=[r2,g22,b2]. The pixel obtained from the Subtract blending mode is R=B–F=[r2–r1,g2–g1,b2–b1]. If the result of the subtraction is less than 0, 0 is used instead. So, using the above example, the same pixel would be 75, 50, 0 in Subtract blending mode.
Move Picture event command
This is the meat of the event, how we move the picture up the screen. Let's look at the Move Picture dialog.
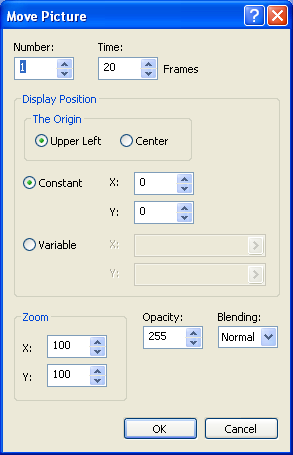
Again, the first selection is the Number, which is the picture number we assigned earlier in the Show Picture command.
The second is Frames, and this is how many frames this operation should take. The maximum is 1000, the minimum 0.
Once again, the origin. It's probably best to keep this the same as for the Show Picture, just to make it easier on yourself.
The X and Y coordinates are where you want to move the picture to. In the case of the above event command, we're moving it to 0, -610.
Move Picture is a bit of a misnomer, it should be Manipulate Picture, since we can choose to Zoom, change the Opacity, or change the Blending mode without moving the picture at all (to do so, just make the move-to XY coordinates the same as the original XY coordinates). These work the same as the those in the Show Picture dialog, except that they will be applied over the period of frames you specified. For example, if you put 100 frames in the Frames text box, and an 100 in the Opacity box, then the picture will fade to an opacity of 100 over the period of 100 frames. However, we're not doing anything fancy this time, just a straight move.
Wait event command
This is what it looks like, a wait. It tells the program not to do anything else in this event until x frames have passed. How long, in seconds, a frame is, depends on your individual game, map, and computer. Typically, a game will run at ~20 FPS (Frames Per Second), but don't bet the farm on it. We're waiting 1000 frames here (split into 999 and 1 because 999 is the maximum wait), because the above move picture is set to take 1000 frames.
Move Picture event command 2
This is essentially the same as the above Move Picture command, except we're moving it the rest of the way.
Wait event command 2
Now we're waiting 1180 frames, 1000 for the move event, and 180 before we move on to what happens next in the event. Ignore the Fade BGM command, it was a part of an expirement I forgot to take out. Without BGM playing, it does nothing, so it hurts nothing to have it in there.
Move Picture event command 3
Now we get to see why Move Picture should be titled Manipulate Picture. In this case we're "moving" the picture to the exact same coordinates as the last Move Picture, or, in other words, not moving it at all. Instead, we're changing the opacity of the picture to 0 over the course of 20 frames.
Erase Picture event command