Final Fantasy VII Mod Thread

  • Thread starter Thread starter Trishty
  • Ngày gửi Ngày gửi
10 phút ma 2g ah` [-(, đến Bluray full HD cung chả nặng đến mức đó , cái minh dùng 10 phút có 30 mb ah` :| . Mà các chương trình khác mình vẫn thu tiếng bình thường , chả hiểu sao FF VII lại không có tiếng chứ :(

---------- Post added at 20:16 ---------- Previous post was at 20:13 ----------

Cái total studio cua bạn mastergam tuy không nét = cái mình xài nhưng dùng tạm cũng được đó ;))

Camtasia ~~. Bản 6.0 xài là ổn.
Quay đoạn 5p-10p tốn chỉ khoảng 30mb... Hình cực nét tùy theo lựa chọn phân giải cho video. Có hỗ trợ tự động upload lên youtube... và nhiều thứ khác nghịch sẽ biết.
Ra bản 7. rồi nhưng dùng bản 6. để đỡ ngốn dung lượng khi quay.
 
Chỉnh sửa cuối:
Không biết Trish làm và upload tới đâu rồi, gần cuối tháng ời =((
 
Có chúa mới bít được.Nhưng lâu quá rùi Tristy ơi định bắt anh em đợi đến 20\11 à >.<
 
Version: v.21 - Date: 2011.11.01 ra rồi nhé các bác :look_down:

[Tutorial] Bootleg Configurator and FF7 Mod Installation


PitBrat nói:
I respect and adore Final Fantasy. The global love for this series is obvious in the devotion and artistry of these community projects. This instructional document details installing and tweaking the best released modifications of Final Fantasy VII for the PC. Buy this game, support the Final Fantasy community, play and enjoy.

-PitBrat

Bootleg, the FF7 mod configurator is now available for download!
BFE-- Bootleg Front End-- is included in the package.


Bootleg Configurator 0035
DOWNLOAD

Big List of FF7 Mods, Tools & Docs

Bootleg ReadMe

Final Fantasy VII (PC)

The Bootleg Edit for Final Fantasy VII

A Tutorial Documenting the Installation of the Community's Best Mods


Version: v.21
Date: 2011.11.01
Author: PitBrat

Target: Update and enhance Final Fantasy VII with the latest and greatest mods the community has released.

Version History:

  • [li]v.21 2011.11.03 Identified Sound Effects Crash; Added PRP Fix for Aeris' Missing Left Hand; Updated Menu Overhaul with M004d.exe; Updated Hardcore Mod with Gjoerulv-1.0.5.rar; Revised Aeris Revival; Revised Avalanche[/li]
    [li]v.20 2011.08.22 Added New Vehicles; Added Repairing Squallff8's Rebuilded Models[/li]
    [li]v.19 2011.08.08 Revised Aeris Revival[/li]
    [li]v.18 2011.08.01 Fixed Flickering Faces for Barret and HQ Aerith[/li]
    [li]v.17 2011.07.29 Fixed Avalanche Install Order and File Name; Fixed HQ Aerith; Fixed Bloodshot's HQMB; Revised Hardcore Mod; Revised Aerith Revival; Updated FF7Music; Model Texture fixes[/li]
    [li]v.16 2011.07.23 Added Kela51's Ice and Limit Textures; Added HQ Aerith Mod; Updated Menu Overhaul; Corrected author names; Grammar and spelling tweaks[/li]
    [li]v.15 2011.07.12 Optimized Hardcore Mod[/li]
    [li]v.14 2011.07.10 Fixed Hardcore Mod Install Freeze; Updated FF7Music; Updated FF7Config.bat; File Names; Skipped Unlucky 13; Optimized For Redundancy[/li]
    [li]v.12 2011.07.09 Fixed Millenia Weapons Install; Updated Trish(AKA Mike)'s Phoenix Install[/li]
    [li]v.11 2011.07.08 Added HTML; Fixed Filenames; Added FF7Music Installer; Added Spell Patch; Added Remastered Patch; Added Appendix[/li]
    [li]v.10 2011.07.04 Fixed Hardcore Install Order; Detailed YAMP; Added Links; Grammar tweaks[/li]
    [li]v.9 2011.07.04 Added Kernel Patching[/li]
    [li]v.8 2011.07.02 Fixed Trish's (AKA Mike's) Phoenix Summons missing texture; Updated Aali's lgp tools; Added Kranmer's compiler; Corrected path names[/li]
    [li]v.7 2011.07.02 Added Gjoerulv's Hardcore Mod; Added Ultima Espio's Aeris Patch; Removed broken model; Updated FeliX Leonhart's Texture pack [FL-WME Beta.exe]; Removed Trish's Custom Phoenix; Grammar tweaks[/li]
    [li]v.6 2011.06.30 Added Remix Fixes for broken battle models; Added Menu Overhaul[/li]
    [li]v.5 2011.06.28 Added Optional Mods; Corrected Magochocobo Battle Scenes (.lgp) Instructions; Fixed Bugenhagen[/li]
    [li]v.4 2011.06.27 Removed broken models; Fixed Dio/Bloodshot's Motorbike conflict[/li]
    [li]v.3 2011.06.26 Aali's OpenGL driver fix for shaders; Removed broken model[/li]
    [li]v.2 2011.06.25 Added Phoenix Rejuvenation Project AddOn Pack [PRP_AddOnPack.exe]; Bugs detail; Grammar tweaks[/li]
    [li]v.1 2011.06.22 Initial Release[/li]

Description:
These are installation instructions to tweak and update Final Fantasy VII beyond what the Remix 2.5.1 project offers.
I use only officially released modification for Final Fantasy VII. These mods are not my work, but the work of talented artists and programmers from around the world. Because the mods are the intellectual property of others, I will not repackage the files for distribution with this tutorial. All of the files are available via http://www.qhimm.com and the Google search engine.

Final Fantasy VII looks and sounds even more magnificent with this recipe of modifications. Most changes are purely cosmetic. Any mod altering gameplay is entirely optional. Polish up that dusty old Remixed Final Fantasy VII with a Bootleg Edit by PitBrat.

PitBrat's Installation Instructions
Required Files


Final Fantasy VII (Buy the game!)

The list of mods discussed in this tutorial is here
Bootleg Mod Listing


Installation Steps
(The order of installation is important for many of these mods.)

NOTE: On Windows 7 machines, run executable files by Right Clicking on the file and selecting Run As Administrator.

Final Fantasy VII
Use the default path on the C:\ drive as per Remix instructions.
Later in this tutorial I reference the FF7 installation folder as .\
The full installation folder is:
(64bit) C:\Program Files (x86)\Square Soft, Inc\Final Fantasy VII\
(32bit) C:\Program Files\Square Soft, Inc\Final Fantasy VII\

Backup System Files
Kernal
NOTE: Building the kernel patch requires these backup files.
Copy .\data\kernel\KERNEL.BIN into C:\temp\kernel\0_original\
Copy .\data\kernel\kernel2.bin into C:\temp\kernel\0_original\
Copy .\data\kernel\KERNEL.BIN into C:\temp\kernel\
Copy .\data\kernel\kernel2.bin into C:\temp\kernel\

LGP Files
NOTE: Required to repair damaged models
Copy .\data\battle\battle.lgp into C:\temp\battle_install\
Copy .\data\wm\world_us.lgp into C:\temp\world_install\

Scene.bin
NOTE:This file is necessary when installing the Hardcore patch.
Copy .\data\battle\scene.bin into C:\temp\scene\0_original\

Patch 1.02
FILE: ff7102zx.zip
Extract and replace files from the archive into the Final Fantasy VII install folder.

FFVII Remix 2.5.1
FILE: Final_Fantasy_VII_Remix_v2-5-1_Installer.exe
Run Final_Fantasy_VII_Remix_v2-5-1_Installer.exe
Use the default path for installation.

Register the Remix
NOTE: Updates the registry on 64 bit systems (Only for 64 bit systems)
Run .\64bitpostinstall.bat

Replace Missing Leviathan .PNG
".\textures\Summons\leviathan\water_1_00.png" is missing, copy and rename "water_00.png" in that directory

Backup the kernel
Copy .\data\kernel\KERNEL.BIN to C:\temp\kernel\1_remix\
Copy .\data\kernel\kernel2.bin to C:\temp\kernel\1_remix\

Avalanche Installation
FILE: Avalanche High Res b9.exe
NOTE: This pack is only partially installed with the Remix. Install this mod for a wide range of graphical enhancements including: magic effects, world textures, models, maps, menu icons and materia.
NOTE: The Menu Overhaul Project replaces parts of this modification.
Run Avalanche High Res b9.exe
Install to the Final Fantasy VII installation folder

Avalanch Update
FILE: Avalanche GUI v2.0.8.exe
Run Avalanche GUI v2.0.8.exe
Install to the Final Fantasy VII installation folder

Gjoerulv's Hardcore Mod (Optional)
FILES: Gjoerulv-1.0.5.rar, FF7Remastered.PrC
Enable Hardcore Remix
NOTE: Enable Hardcore in the Remix Patch before installing Gjoerulv's Hardcore Mod.
WARNING: Failing to enable Hardcore before installing the Hardcore Mod might cause instability.
Run 'run FFVII-Remix-Hardcore.bat'
Quit FF7 after the game loads
Copy .\data\kernel\KERNEL.BIN to C:\temp\kernel\1_hremix\
Copy .\data\kernel\kernel2.bin to C:\temp\kernel\1_hremix\
NOTE: Switching between modes with 'Run FFVII-Remix.bat' and 'Run FFVII-Remix-Hardcore.bat' replaces the files ff7.exe, battle.lgp, flevel.lgp, kernel.bin, kernel2.bin and scene.bin.
NOTE: Switching back to normal mode requires repeating parts of the Bootleg Edit.
Extract the setup file from the Gjoerulv.rar archive.
Run Gjerulv.exe as administrator
Do a full installation to .\data\
Backup the kernel
Copy .\data\kernel\KERNEL.BIN into C:\temp\kernel\4_hardcore\
Copy .\data\kernel\kernel2.bin into C:\temp\kernel\4_hardcore\

Customize YAMP Patches
NOTE: Optional; Skip if installing Menu Overhaul Project
WARNING: YAMP will not work on a modified 'ff7.exe' so skip this section if you plan on installing the Menu Overhaul Project or the Hardcore Mod.
NOTE: This patch modifies 'ff7.exe' and is incompatible with other patches that modify 'ff7.exe'
NOTE: Installing patch 1.02 effectively removes all YAMP patches.
Move Unwanted patch files (.srb and .txt) from .\patches\Already Patched\ to .\patches\Do Not Want\
Move desired patch files (.srb and .txt) to .\patches\
Patch Info:
LuckyTifa (Lucky Tifa - Tifa's Limit cheat)
Csith (Lucky Cait Sith - Cait Sith's Limit cheat)
GyptInstant (Skip FMV hotkey)
9999LimitBreaking (Obsolete)
TransparentDialogBoxes (Obsolete)
MDef (Obsolete)
Copy .\skerb.ex_ into C:\temp\YAMP\
Copy .\installYAMPnormalmode.bat into C:\temp\YAMP\
Copy .\ff7.exe into C:\temp\YAMP\
Copy the 'patches' folder into C:\temp\YAMP\
Run C:\temp\YAMP\installYAMPnormalmode.bat
Copy and replace C:\temp\YAMP\ff7.exe into the Final Fantasy VII install folder

Backup Data Files
Copy .\data\battle\battle.lgp to a backup location (C:\temp\battle_backup\)
Copy .\data\battle\magic.lgp to a backup location (C:\temp\magic\)
Copy .\data\field\char.lgp to a backup location (C:\temp\char\)
Copy .\data\field\flevel.lgp to a backup location (C:\temp\flevel\) (Optional: Only necessary if installing Ultima Espio's Aeris patch)
Copy .\data\minigame\high-us.lgp to a backup location (C:\temp\mini\)
Copy .\data\wm\world_us.lgp to a backup location (C:\temp\world\)
Copy .\data\sound\audio.dat to a backup location (C:\temp\backup\)
Copy .\data\sound\audio.fmt to a backup location (C:\temp\backup\)

Aalis Custom OpenGL Driver 0.7.11b (Required)
FILE: ff7_opengl-0.7.11b.zip
Extract to and replace files in the Final Fantasy VII install folder
Xion999's 'everything is made of light' fix for NVIDIA cards:
Copy and replace the files .\shaders\main.frag and .\shaders\main.vert into .\shaders\nolight\

Aali's OpenGL Settings
FILE: OpenGLconfig.bat
NOTE: For security, save ff7_opengl.cfg to the desktop. Then copy the file from the desktop and paste with replace into the FF7 install folder.
Run OpenGLconfig.bat
A Resolution of at least 1280x960 is optimum
Insure music plugin is loaded in ff7_opengl.cfg file (remove the # infront of music_plugin):
An optimized ff7_opengl.cfg is included later in this document

Important Edits for ff7_opengl.cfg:
window_size_x = 1280
window_size_y = 960
mod_path = avalanche
music_plugin = plugins/ff7music.fgp
# Disable Error Notifications
disable_popup = on


Configure FF7
FILE: FF7Config.bat
NOTE: Enable OpenGL Video driver and configure Sound and Midi drivers
Run FF7Config.bat
Graphics Tab
Renderer: Custom driver
Display Resolution: 640 x 480 16bpp (Full Screen)
Sound Tab
Sound Driver: Your desired soundcard output
MIDI Tab
MIDI Driver: Choose the driver for your MIDI Device
MIDI Date: Yamaha XG Midi is the better choice unless you have a custom soundfont installed
Click OK and allow the registry updates

Install Tools
Cosmo
FILE: cosmo095c.rar
Extract the folder from the archive and move the folder into .\tools\
HRC Resizer
FILE: HRC_resizer.zip
Extract the folder from the archive and move the folder into .\tools\
Image2TEX
FILE: Img2tex_bin.7z
Extract the files from the archive and move the files into .\tools\Image2TEX\
Kimera
FILE: Kimera095b_bin.7z
Extract files from the archive and move the files into .\tools\Kimera\
PCreator
FILE: Beta PCreator v0.85b.rar
Extract the file from the archive and move the file into .\tools\PCreator\
ProudClod
FILE: ProudClodalpha.zip
Extract the files from the archive and move the files into .\tools\ProudClod\
WallMarket
FILE: WallMarket145.zip
Extract the files from the archive and move the files into .\tools\WallMarket\

Compile LGP Tools
FILES: lgp-0.5.zip, compiler.exe
NOTE: These instructions are thanks to Kranmer.
Run compiler.exe and install to C:\
Run C:\compiler\msys.bat
Close the command window when msys.bat is finished
Extract lgp-0.5.zip to C:\compiler\home\[USERNAME]\
Open the file C:\compiler\home\[USERNAME]\makefile in Notepad or another text editor
Locate both occurrences of 'cc' and change them to 'gcc'
Save 'makefile'
Run C:\compiler\msys.bat
In the msys.bat command window type the following command and press enter:
make
Copy the resultant lgp.exe and unlgp.exe files from C:\compiler\home\[USERNAME]\ to C:\temp\

Extract LGP Files
NOTE: Extract the .lgp file into folders in preparation for modding
NOTE: Please remain patient! This process is slow on some systems.
You will need to work within a command window to use lgp.exe and unlgp.exe
Start a Command Windows
Press windows key+R to open the RUN dialog
Type 'cmd' in the text box and press OPEN

Use the command window to issue the commands in each section.

Battle Data
NOTE: Extract battle.lgp and create a working battle folder (C:\temp\battle\)
cd \temp\battle_backup
..\unlgp battle.lgp
move battle.lgp ..\backup
md ..\battle
copy *.* ..\battle


Magic Data
NOTE: Extract magic.lgp with unlgp.exe
cd ..\magic
..\unlgp magic.lgp
move magic.lgp ..\backup


Field Data
NOTE: Extract char.lgp with unlgp.exe
cd ..\char
..\unlgp char.lgp
move char.lgp ..\backup


Flevel Data
NOTE: Only necessary if installing Ultima Espio's Aeris patch
NOTE: Extract flevel.lgp with unlgp.exe
cd ..\flevel
..\unlgp flevel.lgp
move flevel.lgp ..\backup


Minigame Data
NOTE: Extract high-us.lgp with unlgp.exe
cd ..\mini
..\unlgp high-us.lgp
move high-us.lgp ..\backup


World Data
NOTE: Extract world_us.lgp with unlgp.exe
cd ..\world
..\unlgp world_us.lgp
move world_us.lgp ..\backup


Original Battle Data
NOTE: Extract the vanilla battle.lgp with unlgp.exe
cd \temp\battle_install
..\unlgp battle.lgp
copy battle.lgp ..\backup\battle.org
del battle.lgp


FMV Restoration Cut Scenes
FILES: FMVRes.exe, FMVRes-1.bin thru FMVRes-6.bin
NOTE: Install FMVRestoration_ENG_v2 by DLPB for Hi Res FMV's
Place all 7 files together in a folder: FMVRes.exe, FMVRes-1.bin thru FMVRes-6.bin
Run FMVRes.exe and set the install path to .\movies\

sl1982's Field Enhancement 2D Art Packs 1 - 5
FILES: Field Files Pack 1.rar thru Field Files Pack 5.rar
extract Field Files Pack 1 into .\mods\avalanche\
extract Field Files Pack 2 thru Field Files Pack 5 into .\avalanche\field\

FeliX Leonhart's Texture Art Pack
FILE: FL-WME Beta.exe
Run FL-WME Beta.exe and install into the folder:
.\mods\avalanche\

FeliX Leonhart's Texture Art Pack
FILE: FL-BSE v0.1.zip
Extract and move the 'battle' folder into .\mods\avalanche\

FeliX Leonhart's Texture Art Pack
FILES: FL-BSE v0.1.1 UPD.zip
Extract and move the 'battle' folder into .\mods\avalanche\

yarLson Field Upscale Project v0.35
FILE: yarLson Field Upscale Project v0.35.zip
NOTE: A very few scenes replace sl1982's versions. If you prefer yarLson's fractalized art, replace all files. If your prefer sl1982's grittier art, do NOT replace any files.
Extract the Field folder from the archive
Move the Field folder to and replace the files in .\Mods\avalanche\

Magochocobo Battle and World Enhancments
FILES: magochocobo png battle files.rar, corel prison and bonus.rar, magochocobo ff7 battle pack 2.rar
NOTE: Magochocobo's battle scene enhancement packs 1, 1.5 and 2 in PNG format.
NOTE: PNG's take precedence over LGP archives.
Extract and move all .PNG files out of the folders and into .\Mods\avalanche\battle\

Modifying & Compiling LGP Archive
NOTE: To prepare the .lgp archives, copy and replace model files as instructed.
Afterward, use lgp.exe to compile the archives. Please remain patient while compiling.
Field files go in C:\temp\char\
Battle files go in C:\temp\battle\
Minigame files go in C:\temp\mini\
World files go in C:\temp\world\
Magic files go in C:\temp\magic\
Flevel files go in C:\temp\flevel\

FeliX Leonhart Battle Scene Enhancements
FILE: Battle Scene enhancement lgp use.zip
WARNING: Nibelheim Mansion sometimes has texture problems. [RCAA - RCAZ]
Extract, move and replace all files out of the folders and into C:\temp\battle\

Magochocobo Battle Scenes (.lgp)
FILE: Magochocobo Battle Scenes (lgp use).rar
NOTE: The Magochocobo .PNG's take precedence over many of these scenes. The few unique LGP enhancements make this a worthwhile addition.
NOTE: This tip makes it easy to move all the files out of the many folders: browse to the extraction folder, do a search for *.* and sort by name.
Extract, move and replace all files out of the folders and into C:\temp\battle\

Phoenix Rejuvenation Project (Optional)
FILE: FF7-PRP_Installer.rar
Extract files from the archive
Run FF7-PRP Installer.exe and complete the installation
Copy C:\Program Files\Square Soft, Inc\Final Fantasy VII\data\ffprp\00.LGP to C:\temp\prp00\
In the command window type the commands to Extract PRP Models
cd \temp\prp00
..\unlgp 00.lgp
del 00.lgp

Copy desired PRP Models into C:\temp\field\
Copy and replace the following files from C:\temp\prp00\ into C:\temp\field\
Mã:
ateb.hrc
ated.p
aude.hrc
auea.p
awbe.hrc
awca.p
azce.tex
azda.tex
buac.hrc
buae.p
buba.p
bubb.rsd
bubc.p
bubd.tex
bube.tex
bucb.p
bucd.p
bucf.p
budb.p
budd.p
budf.p
bueb.p
bued.p
buef.p
bufa0.rsd
bufb.p
bufb0.p
bufd.p
buff.p
buga0.rsd
bugb.p
bugb0.p
byib.hrc
byid.p
bzdc.p
bzde.p
bzea.p
bzec.p
bzee.p
bzfa.p
bzfc.p
bzfe.p
bzfe0.p
bzfe00.p
bzfe000.p
bzfe0000.p
bzfe00000.p
bzfe000000.p
bzga.p
bzgc.p
bzge.p
bzha.p
bzha0.p
bzha00.p
bzha000.p
bzha0000.p
bzha00000.p
bzha000000.p
cqga.hrc
cqgc.p
cqge.p
cqgf0.rsd
cqha.p
cqha0.p
cqhf.p
cqib.p
cqid.p
cqif.p
cqjb.p
cqjd.p
cqjf.p
crab.p
crac0.rsd
crad.p
crad0.p
craf.p
crbb.p
crbc0.rsd
crbd.p
crbd0.p
crid.hrc
crif.p
crja0.rsd
crjb.p
crjb0.p
crjc0.rsd
crjd.p
crjd0.p
crje.tex
crjf.tex
csaa.tex
csac.p
csae.p
csba.p
csbc.p
csbe.p
csbf0.rsd
csca.p
csca0.p
cscc.p
cscd0.rsd
csce.p
csce0.p
cscf0.rsd
csda.p
csda0.p
csdc.p
csdd0.rsd
csde.p
csde0.p
csdf0.rsd
csea.p
csea0.p
ctib.hrc
ctid.p
ctie1.rsd
ctie2.rsd
ctif.p
ctif1.p
ctif2.p
ctja1.rsd
ctjb.p
ctjb1.p
ctjc.tex
ctje.p
cuaa.p
cuac.p
cuae.p
cuba.p
cubc.p
cube.p
cubf1.rsd
cuca.p
cuca1.p
cucb1.rsd
cucc.p
cucc1.p
cuce.p
cucf1.rsd
cuda.p
cuda1.p
cudb1.rsd
cudc.p
cudc1.p
dabf.hrc
dacb.p
dhge.hrc
dhgf0.rsd
dhgf00.rsd
dhgf000.rsd
dhgf0000.rsd
dhgf00000.rsd
dhha.p
dhha0.p
dhha00.p
dhha000.p
dhha0000.p
dhha00000.p
diff.hrc
digb.p
digd.p
dige.rsd
digf.p
dihe.p
diia.p
diic.p
dija.p
dijc.p
dije.p
djaa.p
djac.p
djae.p
djba.p
djbc.p
dxje.hrc
dyaa.p
dyab1.rsd
dyab2.rsd
dyab3.rsd
dyab4.rsd
dyac.p
dyac1.p
dyac2.p
dyac3.p
dyac4.p
dyad1.rsd
dyad2.rsd
dyad3.rsd
dyad4.rsd
dyae.p
dyae1.p
dyae2.p
dyae3.p
dyae4.p
dybd.p
dybf.p
dycb.p
dycd.p
dycf.p
dydb.p
dydd.p
dyde1.rsd
dydf.p
dydf1.p
dyeb.p
dyed.p
dyee1.rsd
dyef.p
dyef1.p
dyfb.p
dzbb.hrc
dzbd.p
dzbf.p
dzca0.rsd
dzcb.p
dzcb0.p
dzce0.rsd
dzcf.p
dzcf0.p
dzdb.p
dzdd.p
dzde0.rsd
dzdf.p
dzdf0.p
dzeb.p
dzed.p
dzef.p
dzfb.p
dzfd.p
dzff.p
dzgb.p
dzgd.p
eaid.hrc
eaif.p
ebbd.p
ebbf.p
epfd.p
epff.p
epgb.p
epgd.p
epgf.p
ephb.p
ephb0.p
ephd.p
ephf.p
ephf0.p
epib.p
epid.p
epid0.p
epif.p
epjb.p
epjb0.p
epjd.p
epjf.p
eqab.p
eqad.p
eqaf.p
eqbb.p
eqbb0.p
eqbd.p
eqbf.p
eqbf0.p
eqcb.p
eqcd.p
eqcf.p
eqib.hrc
eqid.p
eqie0.rsd
eqif.p
eqif0.p
eqja.rsd
eqja0.rsd
eqjb.p
eqjb0.p
eqjc.tex
eqje.tex
eraa.p
erac.p
erae.p
erba.p
erbc.p
erbe.p
erca.p
ercc.p
ercd0.rsd
erce.p
erce0.p
erda.p
erdb0.rsd
erdc.p
erdc0.p
erdd0.rsd
erde.p
erde0.p
erea.p
ereb0.rsd
erec.p
erec0.p
exga.hrc
exgc.p
exge.p
exgf0.rsd
exha.p
exha0.p
exhc.p
exhe.p
exia.p
exic.p
exie.p
exja.p
exjc.p
exje.p
eyaa.p
eyac.p
eyae.p
eyba.p
eybc.p
eybe.p
eyca.p
eycc.p
eyce.p
eyda.p
fndf.hrc
fneb.p
fzce.p
fzcf1.rsd
fzcf2.rsd
fzda.p
fzda1.p
fzda2.p
fzdc.p
fzde.p
fzdf1.rsd
fzea.p
fzea1.p
fzeb1.rsd
fzec.p
fzec1.p
fzee.p
fzfa.p
fzfb1.rsd
fzfb2.rsd
fzfb3.rsd
fzfb4.rsd
fzfb5.rsd
fzfc.p
fzfc1.p
fzfc2.p
fzfc3.p
fzfc4.p
fzfc5.p
fzfd1.rsd
fzfe.p
fzfe1.p
fzga.p
gjcf.hrc
gjdb.p
gwib.hrc
gwid.p
hjdc.hrc
hjde.p
hkje.p
hlaa.p
hlac.p
hlae.p
hlba.p
hlbc.p
hlbe.p
hlca.p
hlcc.p
hlce.p
hlda.p
hldc.p
hlde.p
hlea.p
hlec.p
hlee.p
hlfa.p

Phoenix Rejuvenation Project Add On Pack (Select Models)
FILE: PRP_AddOnPack.exe
NOTE: A manual installation is required because the installer is problematic.
NOTE: This pack contains new models-- 7 field and 2 world-- not included in the Phoenix Rejuvenation Project.
Run the installer and input the destination folder C:\Temp\PRPADDON\
When the installation progress halts on the message 'cannot locate WORLD-XX.LGP,' click CANCEL
Field Model Installation
NOTE: replace Files
Browse to the folder C:\Temp\prpaddon\temp\char\
Copy and replace the files BZDA.HRC thru BZHB.A into C:\temp\char\ [50 files total]
Copy and replace the files EPFB.HRC thru EQDA.A into C:\temp\char\ [60 files total]
Copy and replace the files FHAA.HRC thru FHHB.A into C:\temp\char\ [35 files total]
Copy and replace the files FIBA.HRC thru FIHF.A into C:\temp\char\ [96 files total]
Copy and replace the files HSJD.HRC thru HTJD.A into C:\temp\char\ [85 files total]
Copy and replace the files HXBC.HRC thru HXIB.A into C:\temp\char\ [88 files total]
Copy and replace the files HYFD.HRC thru HZEC.A into C:\temp\char\ [74 files total]
Copy and replace the file JY1.P to C:\temp\char\
Rename the file JY1.P to JY.P
Copy the file JY.P to C:\temp\char\
World Model Installation
NOTE: replace Files
Browse to the fold C:\Temp\prpaddon\temp\worldmodels\
Copy and replace the files AL.P thru AL4.P into C:\temp\world\ [5 files total]
Copy and replace the files CQC.HRC thru DDC.A into C:\temp\world\ [55 files total]
Copy and replace the files DYB.HRC thru EJD.A into C:\temp\world\ [76 files total]

Phoenix Rejuvenation Project - Aeris' Left Hand Fix
Replace Aeris' missing left hand. This fix was provided by Getsommeee.
Use Notepad to open the file C:\temp\char\cahc.hrc
Locate the following section:
l_foarm
l_uparm
2.31
2 CAJE
Change the indicated line to:
1 CAJE

Squallff8's 'REBUILDED MODELS' Field Models (Select Models)
FILE: 0.MY REBUILDED MODELS.rar
NOTE: There are duplicate models burried within this archive. Choose the model highest in the folder tree.
NOTE: Additional models in the archive not listed below might cause problems during play.
WARNING: Do NOT replace AAFE.A, AFIB.A nor AAGA.A in the C:\temp\char folder! These are standing animations and Squallff8's versions cause problems in game.
Copy and replace the files from inside the listed archive folders into C:\temp\char\
WARNING: DO NOT COPY AAFE.A, AFIB.A nor AAGA.A
Selected Models:
Beach Man 1 - Normal (TEMP) ... 0.MY REBUILDED MODELS\Beach Man 1 - Normal (TEMP)\
Beach Man 2 - Normal (TEMP) ... 0.MY REBUILDED MODELS\Beach Man 2 - Normal (TEMP)\
Bouncer - Left (dvbe) ... 0.MY REBUILDED MODELS\Bouncer - Left (dvbe)\
Bouncer - Right (dufa) ... 0.MY REBUILDED MODELS\Bouncer - Right (dufa)\
boy2_sk ... 0.MY REBUILDED MODELS.rar\temp\0.ARCHIVES\boy2_sk\
bugen 2 ... 0.MY REBUILDED MODELS.rar\temp\0.ARCHIVES\my characters.zip -> .\NEW BUGENHAGEN 2\bugen 2\
CTCC 3.0 ... 0.MY REBUILDED MODELS\temp\0.ARCHIVES\CTCC 3.0\ NOTE:Before installing, Enlarge by 150% with HRC Resizer
Detective - Normal (TEMP) ... 0.MY REBUILDED MODELS\Detective - Normal (TEMP)\
Don Corneo - Normal (TEMP) ... 0.MY REBUILDED MODELS\Don Corneo - Normal (TEMP)\
Fat Man 1 - Normal (TEMP) ... 0.MY REBUILDED MODELS\Fat Man 1 - Normal (TEMP)\
Fat woman (TEMP) ... 0.MY REBUILDED MODELS\Fat woman (TEMP)\
Girl 3 (TEMP) ... 0.MY REBUILDED MODELS\Girl 3 (TEMP)\
Godo(TEMP) ... 0.MY REBUILDED MODELS\Godo(TEMP)\
Grandma - Normal (TEMP) ... 0.MY REBUILDED MODELS\Grandma - Normal (TEMP)\
Grandma 1 - Normal (TEMP) ... 0.MY REBUILDED MODELS\Grandma 1 - Normal (TEMP)\
Lonely Man - Normal (TEMP) ... 0.MY REBUILDED MODELS\Lonely Man - Normal (TEMP)\
Man - Normal (hlfc) ... 0.MY REBUILDED MODELS\temp\Man - Normal (hlfc)\
Man 15 - Normal (emdf) ... 0.MY REBUILDED MODELS\temp\Man 15 - Normal (emdf)\
Man 16(TEMP) ... 0.MY REBUILDED MODELS\Man 16(TEMP)\
Man 17 - Normal (TEMP) ... 0.MY REBUILDED MODELS\Man 17 - Normal (TEMP)\
Man 2 - Normal (gwif) ... 0.MY REBUILDED MODELS\temp\Man 2 - Normal (gwif)\
Man 3 (TEMP) ... 0.MY REBUILDED MODELS\Man 3 (TEMP)\
Man 3 - Normal (gxef) ... 0.MY REBUILDED MODELS\temp\Man 3 - Normal (gxef)\
Man 5 - Normal (dcic) ... 0.MY REBUILDED MODELS\temp\Man 5 - Normal (dcic)\
Man 7 - Normal (TEMP) ... 0.MY REBUILDED MODELS\Man 7 - Normal (TEMP)\
Man 8 - Normal (TEMP) ... 0.MY REBUILDED MODELS\Man 8 - Normal (TEMP)\
Man 9 - Normal (TEMP) ... 0.MY REBUILDED MODELS\Man 9 - Normal (TEMP)\
Merchant - Normal (TEMP) ... 0.MY REBUILDED MODELS\Merchant - Normal (TEMP)\
Old Man 2 - Normal (TEMP) ... 0.MY REBUILDED MODELS\Old Man 2 - Normal (TEMP)\
Rocket Man - Normal (TEMP) ... 0.MY REBUILDED MODELS\Rocket Man - Normal (TEMP)\
Suit man(TEMP) ... 0.MY REBUILDED MODELS\Suit man(TEMP)\
Tifa - Sword (TEMP) ... 0.MY REBUILDED MODELS\Tifa - Sword (TEMP)\
Tifa(5 years old) (TEMP) ... 0.MY REBUILDED MODELS\Tifa(5 years old) (TEMP)\
Tifa's Father(TEMP) ... 0.MY REBUILDED MODELS\Tifa's Father(TEMP)\
Woman - Normal (TEMP eiac) ... 0.MY REBUILDED MODELS\Woman - Normal (TEMP eiac)\
Woman 1 - Normal (TEMP braf) ... 0.MY REBUILDED MODELS\Woman 1 - Normal (TEMP braf)\
Woman 7 - Normal (TEMP) ... 0.MY REBUILDED MODELS\Woman 7 - Normal (TEMP)\
Woman 9 - Normal (TEMP) ... 0.MY REBUILDED MODELS\Woman 9 - Normal (TEMP)\
Woman1 - Normal (TEMP ecib) ... 0.MY REBUILDED MODELS\Woman1 - Normal (TEMP ecib)\
Woman2 - Normal (TEMP dafb) ... 0.MY REBUILDED MODELS\Woman2 - Normal (TEMP dafb)\
Wrestler1(TEMP) ... 0.MY REBUILDED MODELS\Wrestler1(TEMP)\
young hojo ... 0.MY REBUILDED MODELS\temp\0.ARCHIVES\my characters.zip -> .\final young hojo\young hojo\

Resize CTCC 3.0
WARNING: DO NOT COPY AAFE.A, AFIB.A nor AAGA.A
Run .\tools\HRC_resizer\HRC_resizer.exe
Load \CTCC 3.0\ctcc.hrc
Type 150 in the text box by 'New size:'
Click 'Resize'
Copy and replace the files from inside \CTCC 3.0\ into C:\temp\char\

Repairing Squallff8's Rebuilded Models
TOOLS: Kimera, Biturn, Notepad
WARNING: DO NOT COPY AAFE.A, AFIB.A nor AAGA.A
Old Man 4 - Normal (edjd) ... 0.MY REBUILDED MODELS\temp\Old Man 4 - Normal (edjd)\
Open 'EEAC.rsd' in Notepad
Add this text as the first line of the RSD file:
@RSD940102
Save and Replace 'EEAC.rsd'
Copy and replace the files from inside \Old Man 4 - Normal (edjd)\ into C:\temp\char\
Sumo 1 - Top Half (giha) ... 0.MY REBUILDED MODELS\temp\Sumo 1 - Top Half (giha)\
Repeat the process for 'GIHF.rsd'
Sumo 2 - Top Half (gjab) ... 0.MY REBUILDED MODELS\temp\Sumo 2 - Top Half (gjab)\
Repeat the process for 'GJBA.rsd'
Wrestler 3 (TEMP) ... 0.MY REBUILDED MODELS\Wrestler 3 (TEMP)\
Repeat the process for 'DNEE.rsd'
Mr. Coates - Normal (fved) ... 0.MY REBUILDED MODELS\temp\Mr Coates - Normal (fved)\
Repeat the process for 'FVFC.rsd'
Open 'fved.hrc' in Notepad
Make the following change:
head
chest
11.87068
2 FVFC FVFC
Save and overwrite 'fved.hrc'
Punk 2(TEMP) ... 0.MY REBUILDED MODELS\Punk 2(TEMP)\
Open 'CVCA1.P' in Kimera
Double click the model to open it in the P Editor
In Groups select Group 1 and click Group Properties
Set Blending Mode to None and click Apply
In Groups select Group 2 and click Group Properties
Set Blending Mode to None and click Apply
Save and replace the file
Open 'CVCA11.P' in Kimera
Double click the model to open it in the P Editor
Save and replace the file
Open Biturn
Select 'CVCB.tex'
Set Destination format to Bitmap (.BMP) and click Convert!
Select 'CVCC.tex'
Set Destination format to Bitmap (.BMP) and click Convert!
Open 'CVCB.BMP' in Image2Tex
Click Save Texture and Replace 'CVCB.TEX'
Open 'CVCC.BMP' in Image2Tex
Click Save Texture and Replace 'CVCC.TEX'
Punk 4(TEMP) ... 0.MY REBUILDED MODELS\Punk 4(TEMP)\
Rename r back boot.P to CWCA3.P
Rename r back boot1.P to CWCA4.P
Open 'CWAF10.rsd' in Notepad and change 'r back boot.P' to 'CWCA3.P' then save and overwrite
Open 'CWAF101.rsd' in Notepad and change 'r back boot1.P' to 'CWCA4.P' then save and overwrite
Open 'CVHE12.P' in Kimera
Double click the model to open it in the P Editor
In Groups select Group 1 and click Group Properties
Set Blending Mode to None and click Apply
Save and replace the file
Open 'CVHE11.P' in Kimera
Double click the model to open it in the P Editor
Save and replace the file
Man11 - Normal(TEMP) ... 0.MY REBUILDED MODELS\Man11 - Normal(TEMP)\
For each .p file: 'FNFD11.P', 'FNJA1.P', 'FOAA1.P'
Open in Kimera
Double click the model to open it in the P Editor
Save and replace the file
Open 'FNFF1.P' in Kimera
Double click the model to open it in the P Editor
In Groups select Group 1 and click Group Properties
Set Blending Mode to None and click Apply
In Groups select Group 2 and click Group Properties
Set Blending Mode to None and click Apply
Save and replace the file
Open Biturn
Select 'FNGA.tex'
Set Destination format to Bitmap (.BMP) and click Convert!
Select 'FNGC.tex'
Set Destination format to Bitmap (.BMP) and click Convert!
Open 'FNGA.BMP' in Image2Tex
Click Save Texture and Replace 'CVCB.TEX'
Open 'FNGC.BMP' in Image2Tex
Click Save Texture and Replace 'CVCC.TEX'

Dahfa's Field Models
NOTE: Only selected models
Copy files from the mod and replace files in C:\temp\char\
Selected Models:
aerith 5yrsold Release new version [FILE: aerith 5yrsold Release new version.rar]
aerith 10 yrs old [FILE: aerith 10 yrs old.rar]
Barret Navy Model REL [FILE: Barret Navy Model PRP.rar]
BLDE RELEASE [FILE: BLDE RELEASE.rar]
BMEE Release [FILE: BMEE Release.rar]
BOHE release [FILE: BOHE release.rar]
bpdc release [FILE: bpdc release.rar]

Bloodshot's HQ Motorbike mod v2 (With Tweaks)
FILE: HQMBV2 - Classic Buster.rar
WARNING: Installing Bloodshot's HQ Motorbike field model breaks field models:Dio and Employee 2. The fix is later in this tutorial. The bad files are EAAA.P and GBAA.P.
Field Models in the Folder char.lgp
Copy and replace files-- except EAAA.P and GBAA.P-- into C:\temp\char\
WARNING: DO NOT replace EAAA.P and GBAA.P
Minigame Models in the Folder High-us.lgp
Copy and replace files into C:\temp\mini\

Bloodshot's Models
FILE: Models.7z
NOTE: Choosing to install either the 'Cloudsword' or 'Cloud' model gives a harmless 'unexpected 0 count' error in game
WARNING: EAAA.P, IBAA.P and GBAA.P in the 'Cloud - Bike Fix' folder are bad files.
WARNING: EAAA.P breaks the Employee 2 model-- DZGF.HRC. Do NOT copy EAAA.P.
WARNING: GBAA.P breaks the Dio model-- GACJ.HRC. Do NOT copy GBAA.P.
WARNING: Do NOT copy these files from the 'Cloud - Bike Fix' folder: EAAA.P and GBAA.P
Extract the files from the Models.7z archive
WARNING: Do NOT replace these files: EAAA.P, IBAA.P and GBAA.P
Copy files from inside the 'Cloudsword folder and replace files in C:\temp\char\
NOTE: Alternately, use 'Cloud' for a field model without the sword
Copy files from inside the 'TifaDress(NewFace)' folder and replace files in C:\temp\char\
Copy files from inside the 'Char.lgp' folder and replace files in C:\temp\char\
Copy files from inside the 'BarretAdjusted' folder and replace files in C:\temp\char\

Cloud - Bike Fix Fixed
TOOL: Kimera
NOTE: Allows the Bike Fix to work with the Dio Field Model
WARNING: EAAA.P and GBAA.P in the 'Cloud - Bike Fix' folder are bad files.
WARNING: EAAA.P breaks the Employee 2 model-- DZGF.HRC. Do NOT copy EAAA.P.
WARNING: GBAA.P breaks the Dio model-- GACJ.HRC. Do NOT copy GBAA.P.
WARNING: Do NOT copy these files from the 'Cloud - Bike Fix' folder: EAAA.P and GBAA.P
WARNING: Do NOT replace C:\temp\char\GBAA.P and C:\temp\char\EAAA.P
In the 'Cloud - Bike fix' folder:
Rename the file 'gbaa.P' to 'gbaa1.P'
Rename the file 'eaaa.P' to 'eaaa1.P'
Rename the file 'ibaa.P' to 'ibaa1.P'
Rename the file 'hbaa.rsd' to 'hbaa1.rsd'
Open 'brib.hrc' in Notepad and make the following change:
l_foot
l_tibia
9.4201
1 hbaa1
Copy and replace the files in the 'Cloud - Bike Fix' folder into C:\temp\char\
Run .\tools\Kimera\Kimera.exe
In Kimera Open C:\temp\char\brib.hrc
Click on the funny looking left leg of the model. Selected Bone l_tibia-l_femur
Click on 'Remove Part From The Bone'
Click on 'Add Part To The Bone'
Select the file C:\temp\char\GBAA1.P
Click on the funny looking butt of the model. Selected Bone hip-up_bane
Click on 'Remove Part From The Bone'
Click on 'Add Part To The Bone'
Select the file C:\temp\char\EAAA1.P
Save and replace the model to C:\temp\char\BRIB.HRC
Click YES to combine P Bones into 1 file
Open C:\temp\char\hbaa.rsd in Notepad
Change 'ibaa.P' to 'ibaa1.P' for all three occurences
Save and replace 'hbaa.rsd'

Bloodshot's Classic Models
FILE: Classic Models.7z
WARNING: Do NOT copy RT?? files. RT?? files are for the Cloud Field model.
WARNING: Do NOT copy SI?? files. SI?? files are for a Cloud model.
Copy and replace the files from inside the archive's 'battle' folder into C:\temp\battle\

Costa07's New Vehicle Models
FILE: Vehiles[WIP].rar
Extract the folders from the archive.
Copy and replace files from inside the archive folder Vehicles[WIP].rar -> \Vehiles[WIP]\buggy\new\ into C:\temp\world\
Copy and replace files from inside the archive folder Vehicles[WIP].rar -> \Vehiles[WIP]\highwind\Highwind1\new\ into C:\temp\world\
Copy and replace files from inside the archive folder Vehicles[WIP].rar -> \Vehiles[WIP]\highwind\HW back propeller\new\ into C:\temp\world\
Copy and replace files from inside the archive folder Vehicles[WIP].rar -> \Vehiles[WIP]\submarine\new\ into C:\temp\world\

Bunny Girl Dress Field Models
FILE: bunny girls.rar
Extract the folders from the archive
Aeris- Copy and replace the files from out of the folder 'aeris dress' and into C:\temp\char\
Cloud- Copy and replace the files from out of the folder 'cloud dress' and into C:\temp\char\
Tifa- Copy and replace the files from out of the folder 'dress' and into C:\temp\char\

Reinstall New APZ Cloud and Final Cloud Battle Models
FILE: newapzcloud.zip
NOTE: The original mod is difficult to locate, but the necessary files are included in the Remix install.
Extract the folders from the archive.
Copy and replace files from inside the archive folder 'APZ Cloud' into C:\temp\battle\
Copy and replace files from inside the archive folder 'APZ Cloud Final Battle' into C:\temp\battle\
Alternate Method Without newapzcloud.zip
Copy the following files from C:\temp\battle_backup\ and replace files in c:\temp\battle\
RTAA, RTAB, RTAC, RTAD, RTAM, RTAN, RTAO, RTAR, RTAS, RTAT, RTAW, RTAX, RTAY, RTBA, RTBB, RTBC, RTBD, RTBF, RTBG, RTBH, RTBI
SIAA, SIAB, SIAC, SIAD, SIAM, SIAN, SIAO, SIAR, SIAS, SIAT, SIAW, SIAX, SIAY, SIBA, SIBB, SIBC, SIBD, SIBF, SIBG, SIBH, SIBI, SICK, SICL, SICM, SICN, SICO, SICP, SICQ, SICR, SICS, SICT, SICU, SICV, SICW, SICX, SICZ, SIDA

Reinstall Aeris Battle Model
NOTE: Replaces damaged RV?? textures with working RV?? textures from the C:\temp\battle_backup\
Copy and replace the following files from C:\temp\battle_backup\ into C:\temp\battle\
RVAA, RVAB, RVAC, RVAD, RVAF, RVAG, RVAH, RVAM, RVAN, RVAO, RVAQ, RVAR, RVAS, RVAT, RVAW, RVAX, RVAY, RVBC, RVBD, RVBF, RVBG, RVBH, RVBI, RVBK, RVBL, RVBN, RVBO, RVBP, RVDA

Sailor Moon Models for Aeris and Tifa
FILES: sailor jupiter.rar, sailor mars.rar
NOTE: The battle models replace all of Tifa's weapons with vanilla and all off Aeris' weapons with Slayersnext and vanilla.
Extract the folders from each archive
Copy and replace files out of the 'battle' folder and into C:\temp\battle\
Copy and replace files out of the 'char' folder and into C:\temp\char\

Install HQ Aerith Model (Optional)
FILE: FF7 HQ Aerith mod.rar
WARNING: The texture slots are set to 12. Use PCreator to change this to 10 to avoid an error.
WARNING: This model overwrite textures from the Young Aerith model and requires a fix.
NOTE: This overwrites the files copied during the Reinstall Aeris Battle Model step.
Fix Young Aerith Model
Open C:\temp\field\dige.rsd in Notepad
Change TEX[0]=azda.TIM to TEX[0]=azda1.TIM
Save the file
Rename C:\temp\field\azda.tex to azda1.tex
Extract the folders from the archive.
Copy and replace these files from inside the archive folder 'battle.lgp' into C:\temp\battle\
RVAA, RVAB, RVAC, RVAD, RVAM, RVAN, RVAO, RVAQ, RVAR, RVAS, RVAT, RVAW, RVAX, RVAY, RVBB, RVBC, RVBD, RVBF, RVBG, RVBH, RVBI, RVBK, RVBL, RVBN, RVBO, RVBP, RVBQ, RVDA
Copy all files except 'azce.tex' from inside the archive folder 'char.lgp' into C:\temp\char\
WARNING: Do NOT copy nor replace 'azce.tex' because it breaks the young Aerith models.

Reinstall Slayersnext Weapons Models for Cloud
FILE: WeaponModv1.0-slayersnextr.rar
NOTE: Millenia's weapons replace all of these weapons. Required only if you do NOT plan on installing Millenia's Cloud weapons.
Extract files and folders from the archive
Copy and replace files from 'Versión 1.0' into C:\temp\battle\

Reinstall the Slayersnext Aeris Weapons
FILE: AerisWeaponModv0.5-slayersnext.rar
NOTE: This replaces models they might be damaged
Extract files and folders from the archive
Copy and replace files from 'Version 0.5' into C:\temp\battle\

Reinstall Yuffie Battle Model
NOTE: This fixes missing textures by replacing them with textures from the battle.lgp backup (RX?? files)
Copy and replace the following files from c:\temp\battle_backup\ to c:\temp\battle\
RXAA, RXAB, RXAC, RXAD, RXAM, RXAN, RXAO, RXAQ, RXAR, RXAU, RXAV, RXAW, RXAX, RXAZ, RXBC, RXBD, RXBE, RXBG, RXBH, RXBI, RXBK, RXBM, RXBN, RXBO, RXBQ, RXCK, RXCL, RXCM, RXCN, RXCO, RXCP, RXCQ, RXCR, RXCS, RXCT, RXCU, RXCV, RXCW, RXCX, RXCY, RXCZ, RXDA

Trish(aka Mike)'s custom model (Select features)
FILE: Trish(aka Mike)'s custom model pack.7z
TOOL: Image2TEX
Limit Textures
FILES: \textures\Limit\limit\jo_b03_00.png, \textures\Limit\limit\jo_b03_001.png, \textures\Limit\limit\jo_b03_002.png
Copy and replace the 'textures' folder from the archive into the Final Fantasy VII install folder

Battle Weapon Models
Copy and replace the following files from inside the archive into C:\temp\battle\
Copy the following files from archive folder '\Battle\Non effect\Yuffie' into C:\temp\battle\
RXAE, RXCK, RXCL, RXCM, RXCO, RXCP, RXCQ, RXCR, RXCS, RXCT, RXCU, RXCV, RXCW, RXCX, RXCY, RXCZ
Copy the following files from inside the archive folder '\Battle\Non effect\Aerith Gainsborough\' into C:\temp\battle\
RVAE, RVCP, RVCQ, RVCR, RVCS, RVCT, RVCU

Char Save Point Model
Copy and replace the following files from the archive 'Char' folder into C:\temp\char\
NOTE: 'CC Save' and 'Cloud Strife' and 'FFX Save' and 'Memories Save' are alternate versions of the Save Point. Install only one of these models.
Copy all files from inside the archive folder '\Char\FFX Save\' into C:\temp\char\

Magic Phoenix Model
NOTE: Be aware of the inconsistent spelling: 'phoenix' and the American 'pheonix'
Customize the Phoenix Texture (Optional)
NOTE: Choose the texture you prefer or skip to Add Phoenix to use the default texture.
Run .\tools\Image2TEX\Image2TEX.exe
Open '\Magic\pheonix original.bmp'
Save as a .tex file named 'pheonixd.t00'
Copy and replace '\Magic\pheonixd.t00' into the '\Magic\old Phoenix\' folder
Add Phoenix
NOTE: There is an alternate version of this model in the '\Magic\Phoenix' folder
Copy and replace the files from inside the archive folder '\Magic\old Phoenix\' into C:\temp\magic\

Kela51's Limit Textures (Optional)
FILES: blue limit V2 by kela51.rar, blue limit V3 by kela51.rar, limit original by kela51.rar, limit's flash V4 by kela51.rar
WARNING: This limit texture replaces a limit texture from Trish(aka Mike)'s custom model pack.7z.
NOTE: Install only one of these limit textures.
NOTE: The .png texture will override the .tex texture. Therefore the .tex in unecessary when the .png is installed.
Delete the file 'jo.b03_00.png' in the folder .\textures\Limit\limit\
Extract files from the chosen archive.
blue limit V2 by kela51.rar
Copy and replace the file 'jo_b03.tex' into C:\temp\magic\
blue limit V3 by kela51.rar
Copy and replace the file 'jo_b03.tex' into C:\temp\magic\
Copy the file 'jo_b03_00.png' into .\textures\Limit\limit\
limit original by kela51.rar
Copy and replace the file 'jo_b03.tex' into C:\temp\magic\
Copy the file 'jo_b03_00.png' into .\textures\Limit\limit\
limit's flash V4 by kela51.rar
NOTE: Choose only one, either the original or blue limit.
Folder: original limit V4
Copy and replace the file 'jo_b03.tex' into C:\temp\magic\
Copy the file 'jo_b03_00.png' into .\textures\Limit\limit\
Folder: blue limit V4
Copy and replace the file 'jo_b03.tex' into C:\temp\magic\
Copy the file 'jo_b03_00.png' into .\textures\Limit\limit\

Kela51's ICE Texture
FILE: ice by kela51.rar
Ice I Textures
Copy and replace these files from the archive folder 'iceI by kela51\' into C:\temp\magic\
brizad.p, brizad.rsd, brizad.tex
Ice II Textures
Copy and replace these files from the archive folder 'iceII by kela51\tex\' into C:\temp\magic\
brizar_1.tex, brizar_2.tex, brizar_3.tex, brizar_4.tex
Ice II PNGs
Copy and replace these files from the archive folder 'iceII by kela51\png\' into .\textures\Spells\ice2\
brizar_1_00.png, brizar_2_00.png, brizar_3_00.png, brizar_4_00.png
Ice III Textures
Copy the files from the archive folder 'iceIII by kela51\tex\' into C:\temp\magic\ff7\data\battle\magic\brizag\
brizag_1.tex, brizag_2.tex, brizag_3.tex, brizag_4.tex
Copy the files from the archive folder 'iceIII by kela51\tex\' into C:\temp\magic\ff7\data\battle\magic\brizag2\
brizag_1.tex, brizag_2.tex, brizag_3.tex, brizag_4.tex
Ice III PNGs
Copy the files from the archive folder 'iceIII by kela51\ice3\' into .\textures\Spells\ice3\
Ice III Rock Modification (Optional)
Copy and replace these files from the archive folder 'iceIII by kela51\ice rock\' into C:\temp\magic\
brizag_2.p
Copy and replace these files from the archive folder 'iceIII by kela51\ice rock\' into C:\temp\magic\ff7\data\battle\magic\brizag\
brizag_2.rsd, brizag_2.tex
Copy and replace these files from the archive folder 'iceIII by kela51\ice rock\' into C:\temp\magic\ff7\data\battle\magic\brizag2\
brizag_2.rsd, brizag_2.tex

CONTINUED . . .


PitBrat nói:
. . . CONTINUED


Final Fantasy VII (PC)

The Bootleg Edit for Final Fantasy VII

A Tutorial Documenting the Installation of the Community's Best Mods


Version: v.21
Date: 2011.11.01
Author: PitBrat

Add Texture Slots
FILE: Archivo.3DS
TOOL: PCreator
NOTE: Archivo.3DS is located in WeaponModv1.0-slayersnextr.rar and in AerisWeaponModv0.5-slayersnext.rar
NOTE: Some weapon models require more than 2 texture slots.
NOTE: The maximum in 10, a higher number will generate an error.
WARNING: These models will now generate an harmless missing texture warning in the game
To make the weapon textures work, modify the files in C:\temp\battle\
- Run .\tools\PCreator\PCreator.exe and open Archivo.3DS
- In the menu, select 'Options' | 'Battle Model'
- In the menu, select 'File' | 'Open battle HRC'
- Open C:\temp\battle\RTAA for Cloud
- Set the number of textures to 10
- In the menu, select 'File' | 'Open battle HRC'
- Open C:\temp\battle\RUAA for Tifa
- Set the number of textures to 10
- In the menu, select 'File' | 'Open battle HRC'
- Open C:\temp\battle\RVAA for Aeris
- Set the number of textures to 10
- In the menu, select 'File' | 'Open battle HRC'
- Open C:\temp\battle\RXAA for Yuffie
- Set the number of textures to 10
- Close PCreator.

Remix Fixes for Battle Models Damaged by Remix Installer
NOTE: Installing the Remix damages parts of some battle models. This will replace damaged files with the working files from the installation CD.
Copy and replace these files from C:\temp\battle_install\ to C:\temp\battle\
BLBT
DPBH
ETBL
GBBM
HJBC
HPBJ
KSAV
MFAV

Repair Broken Model Textures
Doctor - bljc.hrc
Open C:\temp\char\bmab.rsd in Notepad
Change the line NTEX=0 to NTEX=1
Add the line TEX[0]=arge.TIM

Flickering Face Fixes
Barret
Open C:\temp\char\acgd.hrc in Notepad
Find this section:
head
chest
2.7
1 ACHC0
Change the fourth line to this:
2 ACHC0 ACHC0
Save and replace
HQ Aerith Model
NOTE: Only apply this fix if installed the HQ Aerith Model
Open C:\temp\char\auff.hrc
Find this section:
head
chest
4.851
1 AUGE
Change the fourth line to this:
2 AUGE AUGE
Save and replace
Open C:\temp\char\cahc.hrc
Find this section:
head
chest
4.851
1 CAIB
Change the fourth line to this:
2 CAIB CAIB
Save and replace

Ultima Espio's Aeris Revival Patch (Optional)
FILE: Aeris_Patch_23_March_2011.rar
TOOL: Makou Reactor
WARNING: Might remove some changes made by the Hardcore Mod.
Extract files from the Aeris_Patch_23_March_2011.rar archive
Copy files from the archive 'Char' folder into C:\temp\char\
Flevel Files
WARNING: Do NOT replace '.tex' files, especially 'hand.tex' and 'hand_1.tex'
NOTE: If using the Hardcore Mod, do NOT copy nor replace these 28 files: zz5 zz6 zz7 zz8 qd blin65_1 trackin nvdun1 nvmkin21 farm convil_4 gnmk slfrst_2 anfrst_2 anfrst_5 hyou5_1 hyou8_2 hyou13_2 trnad_2 zcoal_2 md8_32 las2_3 las2_4 las3_2 las3_3 las4_0 las4_4 las4_42
WARNING:If using the Hardcore Mod, exclude these 3 files: las4_0, las4_4 and las4_42
Copy and replace only the listed files from the arhive 'Flevel' folder into C:\temp\flevel\
Mã:
ancnt1
ancnt4
blackbgi
blackbgk
blue_2
bugin1a
bugin1b
bugin2
canon_2
chrin_1a
cos_btm2
crater_1
crater_2
fr_e
fship_1
fship_12
fship_2
fship_23
fship_24
fship_25
fship_3
fship_42
gaiafoot
gaiin_6
holu_1
holu_2
ithill
ithos
itown12
itown1a
itown2
jetin1
junair
las0_8
las2_1
las4_0
las4_1
las4_2
las4_4
las4_42
lost2
md8_5
md8_6
md8brdg2
mtcrl_2
ncorel2
ncorel3
nivgate
nivl_b1
nivl_b12
nivl_b22
onna_4
rcktin5
rcktin6
rcktin7
rktmin2
semkin_4
semkin_5
semkin_6
sininb32
subin_1a
subin_1b
subin_3
trnad_1
trnad_4
trnad_51
trnad_52
tunnel_5
tunnel_6
ujunon5
woa_1
woa_2
woa_3
zcoal_1
zcoal_3
zz4
WARNING:There is an error in the file fship_1
Correct fship_1 using Makou Reactor
NOTE: Complete the section Build the Modified LGP Files before attempting this repair.
TOOLS: Makou Reactor
Run Makou Reactor and open the flevel.lgp file compiled at the end of this guide-- .\data\field\flevel.lgp
In the File list select '178 fship_1'
In the Group list select '13 ear Aeris'
In the middle box select 'Script 20'
In the Action box double click the following entry to open the editor:
17 Displays the dialog "{Aeris} "Let me think, {Cloud.}"" in the window #1
Make the following change my moving the final period outside the close bracket:
17 Displays the dialog "{Aeris} "Let me think, {Cloud}."" in the window #1
Save and replace the flevel.lgp file.
Backup the 'kernel.bin' and 'kernel2.bin' files included in the archive.
Copy KERNEL.BIN to C:\temp\kernel\3_aeris\
Copy kernel2.bin to C:\temp\kernel\3_aeris\
Update the Revival Aeris Model
Open C:\temp\char\AUFF.HRC with Notepad and make these edits.
Change :BONES 23 to :BONES 24
Add the following bold section:
l_uparm
l_collar
4.0425
1 AUHF

armer
l_uparm
1.261581
0


l_foarm
l_uparm
2.31
1 AUIB

Flickering Face Fix for HQ Aerith:
head
chest
4.851
2 AUGE AUGE

Save and replace as C:\temp\char\AERI.HRC

Build the Modified LGP Files
NOTE: Use the command line tool 'lgp.exe'
NOTE: Please remain patient. This might take a very long time on some machines.
NOTE: Ignore the error message-- 'Filename too long: dummy_animation.a'
In the command window, issue the following commands:
cd \temp
lgp battle battle.lgp
lgp magic magic.lgp
lgp char char.lgp
lgp world world_us.lgp
lgp mini high-us.lgp


NOTE: If installing Ultima Espio's Aeris Patch--
lgp flevel flevel.lgp

Install the Modified LGP Files
Move and replace C:\temp\battle.lgp into .\data\battle\
Move and replace C:\temp\magic.lgp into .\data\battle\
Move and replace C:\temp\char.lgp into .\data\field\
Move and replace C:\temp\world_us.lgp into .\data\wm\
Move and replace C:\temp\high-us.lgp into .\data\minigame\

NOTE: If installing Ultima Espio's Aeris Patch--
copy and replace C:\temp\flevel.lgp into .\data\field\

Millenia's Custom Cloud Swords
FILE: cloudswords_installer.rar
NOTE: This mod replaces all of Cloud's swords, even the Slayersnext models.
NOTE: Please remain patient. The installer is slow on some systems.
Extract the file from the millenia_cloudswords_installer.rar archive
Run 'Millenia's Custom Weapons.exe' and install to the Final Fantasy VII installation folder

Improved SFX, by ArmorVil
FILES: new sfx.rar, new sfx.rar, EditedSFX.rar, 139 beta.rar
NOTE: Two archives share the name 'new sfx.rar' but contain different sounds. Be careful not to replace one with the other.
TOOL: Cosmo
NOTE: Replace selected sound effects using Cosmo
NOTE: One of the sound files in Armorvil's 'new sfx.rar' is in the wrong format for Cosmo to load: '254-change clothes.wav' fails on replace.
WARNING: Do not use the sound 438-applause.wav because the game crashes during the theater scene in the Golden Saucer.
WARNING: Do not use the sound 217-snoring.wav because the game crashes when entering the cave with the sleeping man.
Extract files from ArmorVil's 'new sfx.rar' into the folder C:\temp\sfx\
Extract files from ae2011's 'new sfx.rar' into the folder C:\temp\sfx\
Extract files from 'EditedSFX.rar' into the folder C:\temp\sfx\
Extract files from '139 beta.rar' into the folder C:\temp\sfx\
Repairing '254-change clothes.wav'
Load the file in a sound edit such as Audacity.
Save the file in this format: Microsoft ADPCM, 44100 Khz, 4bits, Mono
Run .\tools\cosmo095c\Cosmo.exe
In the menu, select TOOLS | AUDIO EDITOR and open .\data\sound\audio.fmt
Select and replace each sound in the editor with the corresponding sound in C:\temp\sfx\

New Soundtrack with Covarr's FF7Music Installer (Optional)
FILES: ff7music_install_15112.exe
NOTE: Covarr bundles an excellent installer and launcher with a looped OGG version of FinalFanTim's Remastered soundtrack and updated audio DLL's.
NOTE: Replaces the Remix soundtrack
Backup Remix Sountrack
Rename .\ficedula\FF7MUSIC.ini to .\ficedula\FF7MUSIC.ini.BAK
Run ff7music_install_15112.exe
Install to the folder .\FF7Music
Enable Remix Soundtrack
Open .\ficedula\FF7MUSIC.ini.BAK in Notepad
Hilight and copy these two sections: [mp3 (remixed)] and [Custom]
Open .\ficedula\FF7MUSIC.ini in Notepad
Paste the two sections at the bottom of the new FF7MUSIC.ini: [mp3 (remixed)] and [Custom]
Under [Setup], make these changes:
Paths=Custom_Music;OSTRe;FF7_PSF;mp3
ProfileList=PSF;FilenamesOnly;OSTRemastered;mp3;"mp3 (remixed)";Custom
Save FF7Music.ini to the desktop
Copy and replace FF7Music.ini from the desktop into .\ficedula\
Move the 'mp3' folder from .\ficedula\ into .\FF7Music\
Run .\FF7Music\FF7Music.exe
Click 'Configure'
Files Tab:
Profile: Select the desired sountrack
Click 'Save and Exit'
Close FF7Music

DLPB & Kranmer's Menu and Battle Interface Overhaul Project with ReTranslation
FILES: M004d.rar, ff7102zx.zip
NOTE: This mod streamlines the menus, making the interface more convenient and battles much more spectacular.
NOTE: The Menu Overhaul uninstaller will no longer function as intended after the Bootleg modifications.
NOTE: DLPB recommends for optimal quality, (noticeable especially with fonts), not to use the Compress Texture option in Aali's driver.
WARNING: Do NOT install Avalanch mods after this mod.
WARNING: Use the YAMP patches included in this mod. Do NOT install this mod over an already patched ff7.exe.
WARNING: Do NOT enable 9999 Limit Break in ff7_opengl.cfg. Instead use the 9999 Limit Break included with this mod.
WARNING: There are rare glitches where numbers are clipped in selection dialogues.
WARNING: If you are installing the ReTranslation on a game already patched with the Hardcore Mod or Aeris Revival, you will lose portions of the ReTranslation.
Install the official FF7 1.02 Patch
Extract and replace files from the ff7102zx.zip archive to the Final Fantasy VII install folder
Install the Menu Overhaul
Run M004d.exe as administrator
Install to the Final Fantasy VII installation folder
Backup the kernel (Optional for Manually Editing and Patching the Kernel)
Copy .\data\kernel\kernel2.bin to C:\temp\kernel\2_menu\
Copy C:\temp\kernel\0_original\kernel.bin to C:\temp\kernel\2_menu\
Combine Menu Overhaul with previously installed mods
Move and replace all files and folders from inside .\mods\dk\ into .\mods\avalanche\
Edit ff7_opengl.cfg:
mod_path = avalanche
Clear the Cache
NOTE: The Menu Overhaul Installer automatically clears the cache. It is good practice to always make sure these folders are cleared after installing a new mod.
Delete all files and folders in .\cache\
Delete all files and folders in .\mods\avalanche\cache\

Kernel Patching
FILES: FF7Remastered.WM, kernel.bin, kernel2.bin
TOOL: WallMarket
WARNING: When using the Hardcore Mod, do not apply the Remix kernel patch as it might introduce instability due to the fact that the Remix changes to Scene.bin are disabled when using the Hardcore Mod.
NOTE: If you chose not to install any of the optional mods, just skip the steps referencing the absent mod.
NOTE: WallMarket is unstable on some systems. If you cannot complete the patching process, refer to the appendix for instructions on manually editing the kernel.
Extract files from WallMarket145.zip
Run WallMarket.exe

Build Remix Kernel Patch (Tweak & Spell Names) (Optional)
WARNING: Skip the Remix kernal steps if using the Hardcore Mod.
NOTE: FF7Remastered.WM is the equivalent of this patch. Use FF7Remastered.WM instead of building 1-remix.WM.
Open C:\temp\kernel\1_remix\KERNEL.BIN
Select FILE | Create Changes Patch (*.WM)
Click NO in the popup "Create patch based on changes from previously loaded KERNEL.BIN"
Open C:\temp\kernel\0_original\KERNEL.BIN
Click YES in the popup "Include Text Changes?"
Open C:\temp\kernel\0_original\kernel2.bin
Save C:\temp\kernel\1_remix.WM
Build Menu Overhaul Kernel Patch (Grammar Tweaks)
Select FILE | Open C:\Temp\kernel\2_menu\KERNEL.BIN
Select FILE | Create Changes Patch (*.WM)
Click NO in the popup "Create patch based on changes from previously loaded KERNEL.BIN"
Open C:\temp\kernel\0_original\KERNEL.BIN
Click YES in the popup "Include Text Changes?"
Open C:\temp\kernel\0_original\kernel2.bin
Save C:\temp\kernel\2_menu.WM
Build Aeris Patch Kernel Patch (Modified Umbrella Weapon)
Select FILE | Open C:\temp\kernel\3_aeris\KERNEL.BIN
Select FILE | Create Changes Patch (*.WM)
Click NO in the popup "Create patch based on changes from previously loaded KERNEL.BIN"
Open C:\temp\kernel\0_original\KERNEL.BIN
Click YES in the popup "Include Text Changes?"
Open C:\temp\kernel\0_original\kernel2.bin
Save C:\temp\kernel\3_aeris.WM
Build Hardcore Kernel Patch (Hardcore Mod Changes)
Select FILE | Open C:\temp\kernel\4_hardcore\KERNEL.BIN
Select FILE | Create Changes Patch (*.WM)
Click NO in the popup "Create patch based on changes from previously loaded KERNEL.BIN"
Open C:\temp\kernel\0_original\KERNEL.BIN
Click YES in the popup "Include Text Changes?"
Open C:\temp\kernel\0_original\kernel2.bin
Save C:\temp\kernel\4_hardcore.WM

Apply Patches to Finalize Kernel
NOTE: Wallmarket is unstable when applying patches. If Wallmarket crashes while applying patches, just reload Wallmarket and restart the Apply Patches section.
Select FILE | Open C:\temp\kernel\KERNEL.BIN
Select FILE | Apply Changes Patch (*.WM)
Open C:\temp\kernel\FF7Remastered.WM
NOTE: FF7Remastered.WM is the patch used in the Remix. Use it instead of 1_remix.WM.
Select FILE | Apply Changes Patch (*.WM)
Open C:\temp\kernel\2_menu.WM
Select FILE | Apply Changes Patch (*.WM)
Open C:\temp\kernel\3_aeris.WM
Select FILE | Apply Changes Patch (*.WM)
Open C:\temp\kernel\4_hardcore.WM
Select FILE | Create "KERNEL.BIN" and "KERNEL2.BIN"

Close Wallmarket
Copy and replace C:\temp\kernel\KERNEL.BIN into .\data\kernel\
Copy and replace C:\temp\kernel\kernel2.bin into .\data\kernel\

Clear the cache before trying any new modifications
WARNING: Backup save games before deleting the Final Fantasy VII folder from the virtual store
NOTE: On Windows 7 run FF7.EXE as administrator, otherwise your save games and cache files are stored in:
(64bit) C:\Users\[USERNAME]\AppData\Local\VirtualStore\Program Files (x86)\Square Soft, Inc\Final Fantasy VII\
(32bit) C:\Users\[USERNAME]\AppData\Local\VirtualStore\Program Files\Square Soft, Inc\Final Fantasy VII\
Delete all files and folders in .\cache\
Delete all files and folders in .\mods\avalanche\cache\

Edit ff7_opengl.cfg
Verify that 'ff7_opengl.cfg' looks similar to the one included in the appendix under 'ff7_opengl.cfg Settings' section.

Play Final Fantasy VII

NOTE: Run the game as administrator to prevent unexpected behavior.
Right click on the file:
.\Square Soft, Inc\Final Fantasy VII\FF7.EXE
Click on the Compatibility tab
Check the box by Run this program as an administrator
Click OK
 
Mod theo PitBrad chắc chết mấy:|
Có lẽ chờ hàng của bác Trishty vẫn tốt hơn :)
 
Cái boostleg này lúc xài nó đòi phải còn dư 16GB,đỡ sao được đây,mà nếu làm sai thì toàn bị critial hỏng cả game.
Tristy ơi sắp đến ngày 20/11,có thể release được chưa :|
 
Prồ nào thử quyết tử với cái bootleg đi. em là em chịu thôi, tính ẩu nên dễ sai một ly đi một dặm lắm :))
 
Bản patch rất đáng để chờ đợi. Cảm ơn Tristhty nhé. Có những người như pác mà FF7 mới tồn tại và được yêu mến cho đến tận bây giờ.
Hi vọng được góp sức nếu bạn cần sự giúp đỡ nào có thể pm tui. ( 3max ko rành lắm nhưng có thể sử dụng sket, af, corel, ps ^^)

Lời cảm ơn chân thành của 1 fan FF7.
-langel-
 
First Look
ff72011-11-1320-18-55-56.png

ff72011-11-1320-22-29-48.png

ff72011-11-1320-28-32-26.png

ff72011-11-1320-30-57-09.png

ff72011-11-1320-28-07-84.png

ff72011-11-1320-38-09-40.png

[video]r7KAiSQUvtk[/video]

7 days left

5 pass:
**** download (multiurl)
****** download (mf, mu)
************ pack (rar)
************** pack (7zip)
********************* installer (exe)

Model done 100%, only fix error left x.X!
Problem\Win I 32bits I 64bits
FF7Music launcher I yes I no
Registry in Installer I no I no

Total unpack file size ~ 6GB
 
Chỉnh sửa cuối:
Phải công nhận FF7 là pc game hay nhất mọi thời đại :sure:
Mình chơi game này từ hồi cấp 2 vậy mà vẫn không sao quên được, ngày đêm khắc khoải mong đợi phiên bản remake của Square Enix (nhưng có lẽ sẽ không bao giờ trở thành hiện thực :(( )

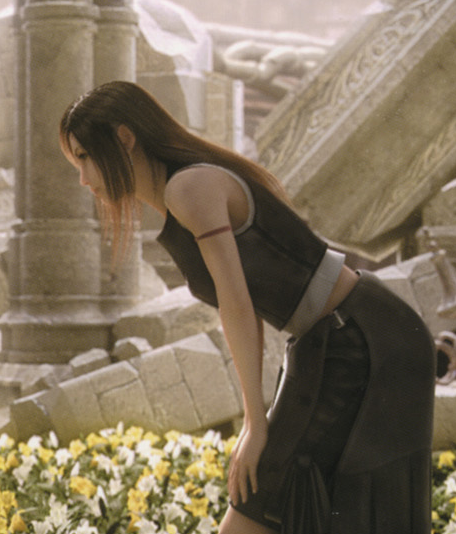
Cơ mà bác Trishty cho mình hỏi tý, trong bản mod có đoạn nào Tifa mặc bộ này không ợ :-?

Tifa_Lockhart.png
 
@Gr666n: Tifa AC Model, có đầy ^^
Nói chung bản game FF7 vẫn thích Tifa mặc bt hơn :p
 
Đẹp quá.Đúng là Tristy có khác.Nhìn thèm quá chỉ còn phải đợi 1 tuần nữa là có thể thưởng thức lại FF7 ùi :>.
Mà tiện cho mình hỏi trong bản patch này có hardcore mode ko :P
 
Back
Top